
3.7. Settings
To open the settings page, click on the  icon located to the right in the в header.
Three are three active tabs:
Admin panel — responsible for managing Boro VoD;
My account — manages the currently-in-use account;
Project settings — lets the user manage projects.
Attention
Admin panel tab is available only for users withSuperadminandSupervisorroles. See the Global roles part for an in-depth look into user roles.Regular users can access only two tabs: My account and Project settings.
3.7.1. Admin Panel
Boro VoD Admin panel is responsible for managing the overall solution. An administrator can use this panel to:
Set the general system settings such as language or time zone;
Manage users, assign roles to them, etc.;
Review info related to projects, probes, and validation tasks;
Configure email notifications;
Browse and upload license certificates;
See info regarding system components;
Enable system control via API.
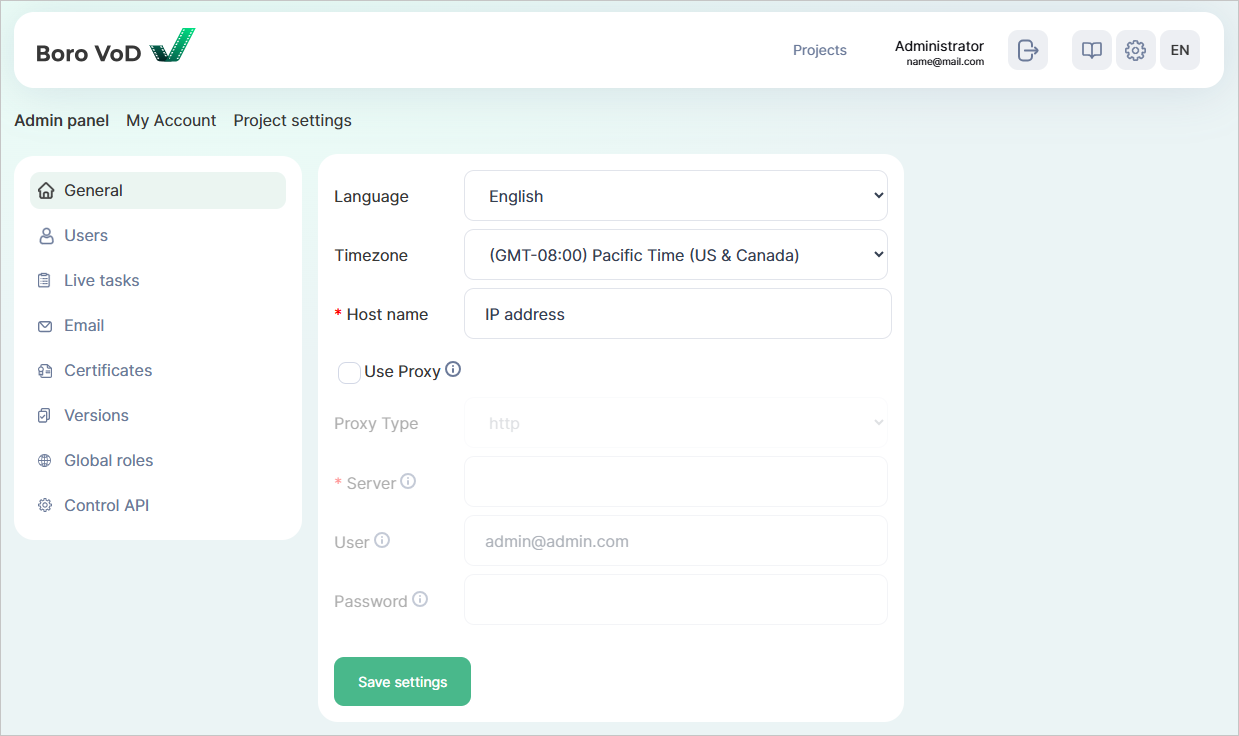
General
While on the General tab, you can specify the following system settings:
Language — English or Russian;
Timezone — time zone in UTC format;
Host name (required) — server address that the system is located on. This parameter’s value will be included in the URL that will be part of the outbound email messages.
Attention
Without specifying the host name, you won’t be able to use API.
On this tab you can also enable the use of a proxy server for connecting Boro VoD to external servers, in case direct access to the global Internet is restricted. To enable this option, check the Use Proxy box and specify the required settings:
Proxy Type — available for
httponly;Server (required) — proxy server IP address in the
IP address:portformat;User — user name for authorization on the proxy server;
Password — password for authorization on the proxy server.
Once all settings have been set, click 
Users
The Users tab mainly consists of a list of users that signed up in the system, represented as a table. The table includes the following columns:
# — sequence order of users in the list;
Name + E-mail — contains names of users—if specified—and email addresses;
License status — shows one of license statuses for each user:
active— user passed verification and is given a package of licensed hours for analyzing media files. The limit is set by the administrator. User verification procedure is configured in the settings. User can be verified by the Boro VoD server administrator or initial confirmation via email, followed by confirmation by the Boro VoD server administrator. The requirement to pre-confirm each newly registered account via email is enabled in the Email section.none— user hasn’t completed the verification procedure.
Status — displays the
blockedstatus in case a user was blocked;User ID — contains a unique user ID.
If you click on a user’s name and/or email address in the table, individual user page will be opened. There, you can review or edit said user’s information in more detail. This page contains four tabs, see below for their description.
User information
In User information, you can view user description that includes user’s email address, status (active/blocked), date of creation and verification, full name, country, license status, number of projects that the user is part of, and permission for the user to create their own projects.
To the right is the Projects table including projects that the user is part of. It contains the following columns:
Project name — displays the names of the projects—click on one to be redirected to its page;
Active probes — shows the number of active probes in the project;
Active tasks — outlines the number of active tasks and general amount of tasks in the project;
Users — pinpoints the list of all users in the project as well as their roles;
Actions — comprises the
 and
and  buttons:
Click on the first one to download a JSON-formatted project file,
Click on the second one upload a project file to the system. To do this, first select the file then click
These buttons can prove to be useful in certain cases, such as migrating from Boro VoD Service to Boro VoD Solution.
Under the table you can check out the list of deleted projects.
To expand it, click 
Edit settings
In Edit settings, you can edit user information, including email address, full name, status, and description.
To change the user’s password, enter the new password in the New password, then enter it again in the Confirm password.
After entering, click on . To delete a user, click 
Here you can also change a user’s role in the project.
Go to Add project role and specify project number in the Project field.
You can double-check the number in the project-id parameter inside the JSON file containing project settings.
Then in the Project role drop-down list select the role that you’d like to assign to a user in the project.
Finally, click on Add project role.
Below is the projects table that pretty much fully resembles the one in the User information tab. With the only exception being that in the Users column you can delete users that are not owners of this specific project.
Statistics
In Statistics, you can view a certain user’s statistics, which include the number of projects that they are part of, number of registered probes and tasks, as well as data and time of their first and last actions in the system.
User rights
In User rights, you can manage a certain user’s rights. Two options are available:
Project creation — gives the user permission to create projects. After disabling this, the created projects aren’t deleted from the system and remain accessible to the user until they are manually deleted. Superadmin can also delete these projects, if needed. If the user has the permission to create projects, the Disable project creation button will be displayed on this page. To withdraw permission, click on this button then confirm the action. And vice versa: if the user has no permission to create projects, the Enable project creation button will be displayed. Click on it and confirm the action, if you want for the selected user to ba able to create projects.
Time limit — limits the number of licensed hours available for the selected user. To do that, check the Limit the number of hours box and enter the required number. If the checkbox isn’t ticked, the user will be able to use all the hours provided by the purchased server license. Click

Live Tasks
Use the Live tasks tab to see the list of project-specific running tasks, presented as a table.
The table includes the following columns:
Project — contains the names of projects. Click on a project name to open the project in the view that the user selected as the default view. To move to the project’s settings, click on
 near its name.
Below is the list of users that were granted shared access in project’s settings, or that were added to the project from the settings page.
Click on the name and/or email address to open the user-related info from the Users tab;
near its name.
Below is the list of users that were granted shared access in project’s settings, or that were added to the project from the settings page.
Click on the name and/or email address to open the user-related info from the Users tab;App — contains the names and versions of running probes. Click on the name to open the probe’s page. Displayed for each probe is its current probe version;
Task — contains the list of running tasks. Click on the name to open the task’s page in the related project;
Start — shows the start time of tasks in UTC format.
At the top of the table, displayed in the Time parameter are the current date, time, and time zone in UTC format. Shown in the Collect data duration parameter is the time spent on collecting the data that’s displayed on this page.
Email
This tab can be used to configure email message delivery and contains three blocks.
In this block you can specify the email delivery method by choosing the needed value from the Method drop-down list. Available are:
disable— email delivery disabled; on a new installed Boro VoD instance this value is set by default;smtp— email delivery via SMTP;sendmail— email delivery via MTA.
In the Emission email address field, specify the address that email messages will be delivered from.
Here you can also find 2 checkboxes:
Raise delivery errors — enables generation of error notifications, in case a message wasn’t delivered. This works only if the external mail server is configured to immediate mail delivery;
Enable confirmation — enables necessary confirmation of every account that was signed up via email again.
Attention
By default, each new registered account must be manually confirmed by the Boro VoD server administrator on the Users tab.
If Enable confirmation is enabled, the system sends the user an email with a link to confirm their email address specified during the registration. However, the final confirmation of the account is performed by the Boro VoD server administrator on the Users tab.
After all settings are configured, click on Save settings
SMTP
The block contains the following items:
Address field — lets the user specify the remote mail server address;
Port field — lets the user specify the порт remote mail server port;
Domain field — lets the user specify HELO address domain;
User name field — lets the user specify the user name in case the mail server requires authentication;
Password field — lets the user specify the password in case the mail server requires authentication;
Authentication field — lets the user specify the type of authentication:
plain — password is passed without being encrypted,
login — password is passed in Base64-encoded form,
cram_md5 — combination of the request/response service and Message Digest 5 algorithm for hashing important info.
Enable STARTTLS auto checkbox — checks whether STARTTLS is enabled on the SMTP server and launches its use;
Tls checkbox — lets the SMTP connection use SMTP/TLS (SMTPS: SMTP wrapped inside a TLS connection);
Openssl verify mode field — lets the user choose the OpenSSL certificate validation mode. Useful for validating self-signed or wildcard certificates. The following values are available:
peer — mutual client-server authentication,
none — no authentication applied.
Sendmail
The section contains the following items:
Location — allows you to set the location of the sendmail executable. The default folder is
/usr/sbin/sendmail.Arguments — allows you to indicate command-line arguments, that will be passed to sendmail. The default value is
-i.
Note
To use the sendmail method, you need to have a mail transfer agent (MTA) installed on the same server, e.g. Postfix, Exim, etc.
Test mail
Here you can send a test email message to ensure that everything is configured correctly. Enter an email address in the Email field and click Send test mail.
Certificates
Access the Certificates tab to download a system fingerprint (CSR) that the Elecard technical support team will generate a license certificate for, upload generated certificates, and view the related info.
To download a CSR, click  in the Download CSR block.
You can upload generated certificates to the system in the Upload certificate section. There are two types of certificates:
Https certificate is used to encrypt probe-server communication as well as prevent the server from communicating with an unlicensed probe and executing unlicensed requests;
Limit certificate stores license limits, including test period expiration date, license balance, information to connect to the HASP key, etc.
To upload a certificate, select the required file then click on 
Note
For an in-depth look into issuing and installing certificates, see the Installing Certificates section.
Certificate parameters are displayed in the License status section:
C — two-letter code of the country where the organization is registered;
ST — code of the region where the organization is registered (for Limit certificate);
L — locality where the organization is registered;
O — organization’s name (for Https certificate);
OU — organization’s department;
CN — domain name which the certificate is issued for;
emailAddress — email for communication with the administrator;
not_before — date of certificate issuance;
not_after — certificate expiry date;
extensions — additional information (you can leave this parameter empty).
In a Limit certificate, the extensions parameter contains the following information:
hours limit — license balance;
is service — equals true, if the certificate licenses the system as a cloud one. If the value is false, the system is licensed as a local solution;
hasp id — HASP key ID.
A HASP key is used to provide additional hardware protection for Boro VoD Solution. It is a USB dongle that has to be inserted in a USB port. If HASP protection is enabled in the certificate, then validation tasks can be launched as long as the key is inserted in the port of the server that the software is installed on.
You can view the info regarding the HASP protection status in the HASP status section. The section contains the following parameters:
message — message saying that the key is enabled;
is_ok — takes true if the key is enabled; otherwise—false;
hours limit — the number of available channels.
Note
The HASP driver is installed alongside Boro VoD Solution. No extra actions are required. Manual installation procedure is described in the Manual installation of HASP drivers section. In case you run into an issue, contact the Elecard technical support team.
Versions
On the Versions tab, you can view the info regarding the versions of system components. The information is presented as a table containing the following columns:
Component — name of component;
Version — version of component;
Details — extra info.
The Details column may contain information such as
last_commit — date, hash, and description of the last commit related to a certain component;
build — info regarding the current version of the component build: build date, version of the tool used in the build, name of the computer the build was done on, and tags;
note — extra notes.
This column may also contain a more detailed description of the component version or the date of creating the archive, where said component is stored.
You can copy the information by clicking on 
Global Roles
On the Global roles tab, you can manage user roles in the system as well as add new users and assign them roles. The user list is presented as a table containing the following columns:
Email — contains user’ emails. Click on an email to open user info taken from the Users tab;
Name — displays users’ names;
Role — contains drop-down lists where for each user you can specify either the
SuperadminorSupervisorrole;Actions — contains Change and Delete buttons. Click on the first one to apply the newly assigned role to a user. Click on the second one to delete a user.
If you have superadmin privileges, you can add a new user and assign them a role. Go to the last row of the table and enter the new user’s email in the blank field of the Email column. Next, select the role in the Role column. Finally, click on Assign role in the Actions column.
Below is a table where the rights of users with different roles are described:
Superadmin:
has full access to the server administering dashboard,
can confirm user registration and assign roles,
can set up restrictions for users,
has full access to all projects and control over tasks created by any user,
Supervisor:
can view all projects and tasks created by any user,
can access the server administering dashboard in the read-only mode.
Control API
The Control API tab contains 2 checkboxes:
Enable API — if checked, it gives users control over the server via API;
Verify HMAC signatures — if checked, it enables user authentication for using API. See a more in-depth description in the Signing API Requests section.
After you are done with the changes, click
3.7.2. My Account
In the My Account tab, you can change name and password, delete the account, and manage API keys.
User Information
To change your in-project name, enter the new name. To save changes, enter the currently-in-use password and click
The same procedure applies to email change.
Change Password
To change your password, enter the new password twice in the corresponding fields.
To save changes, enter the currently-in-use password and click
Control API
If user authentication for using API is enabled on the Boro VoD server, then a user will see an active  button after opening the Control API side tab
In this case, a Control API key is necessary for each user to be able to send API requests to the server.
To create a key, click
If you think the key was compromised, you can delete it using the  button and generate a new one at any moment.
Delete Account
To delete your account. click on  and confirm deletion in the opened window.
Warning
A deleted account cannot be restored! Deleted along with the account will be the created projects—unless they were transferred (see Project Transfer) to other accounts that are registered in Boro VoD beforehand.
3.7.3. Project Settings
In Project settings, you can edit a project’s name, update your authentication file, provide shared access to a project, specify the default project view and report format, and delete projects.
First, select a project from the Select project to edit list—then you will be able to access the sidebar with project settings.
Edit project name
To change a project’s name, enter the new name and click Rename.
Authentication File
The authkey.pub authentication file links a probe to a project.
On each OS, it is added to the probe folder after a probe is downloaded.
Updating this file prevents from launching probes that were already downloaded.
To replace the file, do the following:
Click on Update authentication file. In the confirmation window click OK to move on to updating the file. Updated file will begin downloading.
Stop the probe and replace the old
authkey.pubfile with the new one.
Project Participants
Here the project owner can grant other signed-up Boro VoD users access to their project 1. The following access categories are available:
administrator — this role fully resembles the project owner role. An administrator:
can download probes and manage them as well as change project settings;
can create validation tasks;
has access to any report generated by any user.
Additionally, an administrator can delete themselves from a shared project or delete the project entirely.
User — this role provides pretty much full control over a project and the corresponding probes—with the exception of being able to Change project settings.
There is also another role with its own access category called Guest. It is assigned to any unregistered user and provides them the project for view only. See a more in-depth description in the Guest Mode section.
The table below gives a more in-depth description of how rights are distributed between roles:
Guest |
User |
Administrator |
|
|---|---|---|---|
Access to operation view: Settings |
V |
V |
|
Access to operation views: Projects, Dashboard, Task Pge, Templates, Probes, Probe page |
V |
V |
V |
Access to task management (start, stop, restart, delete) |
V |
V |
|
Access to template management |
V |
V |
|
Access to probe management (download, launch, stop, restart, delete) |
V |
V |
|
Access to create and download JSON, CSV, and PDF reports |
V |
V |
|
Access to full project settings |
V |
||
Partial access to project settings: Report settings, Restart task |
V |
V |
- 1
Only project owner and project participants with administrator privileges can manage project access.
Project Sharing
Note
Shared access can be arranged only for registered users.
To arrange shared access to a project, first access it as its administrator (owner). From there on, you have two options:
Go to
Open the Projects ➝ in the My projects or All projects list find the project you need and click
➝ go to the Project participants tab.
Enter the email of the participant that needs shared access, select their role in the project, specify the default project view and click Add.
The user that was granted shared access will receive a notification email containing a link to the project. To see the project, go to Projects ➝ All projects.
Note
Shared access does not imply extra charge on licensed hours from the project owner’s account. Participants retain their shared access rights even if the license balance is zero.
Stop Project Sharing
Go to
➝ Project settings ➝ select the project which you would like to terminate shared access for ➝ go to the Project participants tab.Select an account from the Project participants list and click Delete. After shared access’ termination, said participant will not be able to access the project from the All projects list.
Guest Mode
➝ Project settings ➝ select a project ➝ in the Guest mode tab enable the guest mode to provide access to the project for unregistered users.To enable/disable project access in guest mode, click on Enable/Disable Guest Mode.
Project Transfer
Attention
Prior to transferring a project, ensure that the package of licensed hours in the new potential owner’s account is enough to fit the scale of media file validation tasks they are about to work with. If the balance reaches zero before the end of the billing period, access to media file validation will be temporarily suspended until the start of the next billing period or an extra package of licensed hours is purchased.
Project owner can transfer their project to a different Boro VoD user;
Adding said user to the project with administrator privileges is required (see the Project Sharing section);
Once done with that, select said user from the drop-down list and click Transfer project;
Said user will receive an email—inside will be the link to the transferred project. After following the link, the user will be redirected to a page where they can accept the project transfer. Until the user accepts the transfer, the owner can cancel it;
After accepting the transfer, the user will receive full rights to managing the project;
Former owner will retain administrator privileges in that project;
In case the user declines, the project will not be transferred.
Project Default View
You can select the web page that will be opened upon entering the project. Among the available options are the Dashboard, Templates, and Probes pages. By default, the Dashboard page is selected.
To select a different page, select it from the list and click Save
If a user has set a default page of their own, then their page will prevail over the page set for the entire project.
Generate a Report
JSON, CSV, or PDF. By default, the PDF option is set.Note
Boro VoD provides manual, on-demand report generation. To get such a report:
Go to Dashboard → in the Completed tasks block use the corresponding buttons.
Use the TaskReportGenerate API method.
Delete Project
Only a project’s administrator can delete the project they are part of. Once deleted, a project cannot be restored. A deleted project’s authentication file becomes invalid: To work with new projects, make sure to download new probes.
Restart Stalled Tasks
Stalled status.
See the Statuses and Results section to learn more.